
Introduction
The DAISY Add-In was designed to help content creators produce accessible documents, from Microsoft Word documents, for people with print disabilities. Installing this add-in permits the saving of Word documents into DAISY XML, and then DAISY Digital Talking Books (DTBs), automatically.
The DAISY Add-In, for Microsoft Word 2003, 2007 and Word 2010 was released in December 2011. In January 2014, add-ins for both the 32 and 64-bit versions of Office 2013 was created, courtesy of Microsoft Japan.
Instructions for Use
- Note: The following instructions assume that you have MS Word 2003, 2007, 2010, or 2013+ on your computer. If you don’t, you will not be able to use this DAISY Add-In.
- Download and install the DAISY Add-In. Before you install the DAISY Add-In, close all Office applications. Also, please make sure you know the version of Word you are using. If you don’t know, ask an administrator.
- Download the correct version of the DAISY Add-In from one of the following links:
- For Word 2003, 2007 and Word 2010:
- For Word 2013 (courtesy of Microsoft Japan):
- Navigate to the directory into which you downloaded the file.
- Double-click the file.
- Follow the instructions presented to you. They may be different depending on the Windows version installed on your computer.
- When the add-in has been successfully installed, click the “Finish” button.
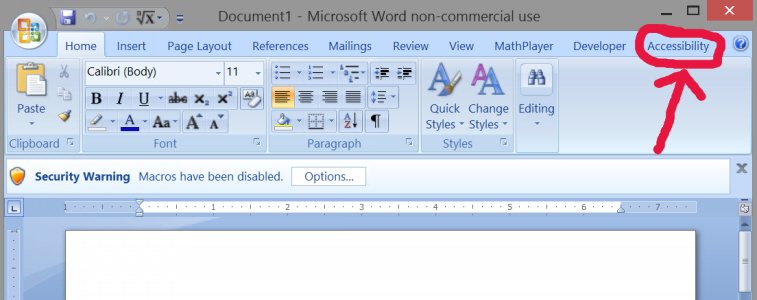
- Open Word. Note that an “Accessibility” tab has been added to the ribbon.
- Download the following Save As Daisy Add-In “Help” resources: Help.chm. Remember where you store this file so that you can access it in the future. We highly recommend reading the “Instruction Manual” included in this help file after completing this Tutorial. It covers all the features of the Save As DAISY Add-In.
- Next, install the DAISY Pipeline using the following link: DAISY Pipeline 2 V1.10
- Download and install AMIS, a free Windows-based, DAISY Digital Talking Book (DTB) reader, using this link.
- Download and install DDReader+, a second DAISY Reader.
(This page brings you to a page that is in Spanish. We’ve used Google to translate the download page to English HERE.) - Using Word, open the accessible.docx file you created in Tutorial #1.
- Click on the “Accessibility” Tab in the Menu bar.
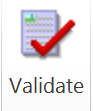
- Click on the “Validate” button. It will double-check your DOCX file to make sure that it can be converted into an accessible DAISY eBook.
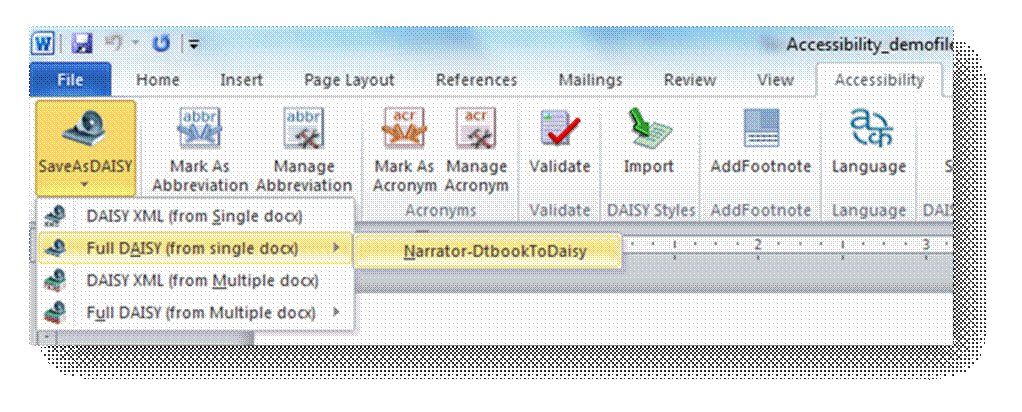
- Next, click on the SaveAsDAISY button. You see four choices:

- Click on the second option under SaveAsDAISY, “Full DAISY (from Single docx) –> Narrator-DtbookToDaisy” in preparation to save accessible.docx as a fully-accessible DAISY eBook.
- Choose a source directory for the output files. If you click the Browse button, it will allow you to either select a location or create a new folder where your files will be placed. We suggest that you create a new directory. Enter the remaining information displayed below.
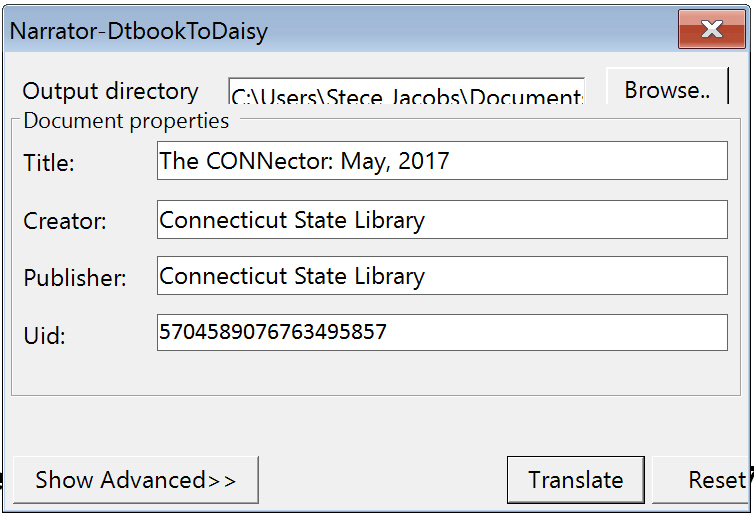
- Click the “Translate” button. You will see several dialog boxes displayed during the conversion process.
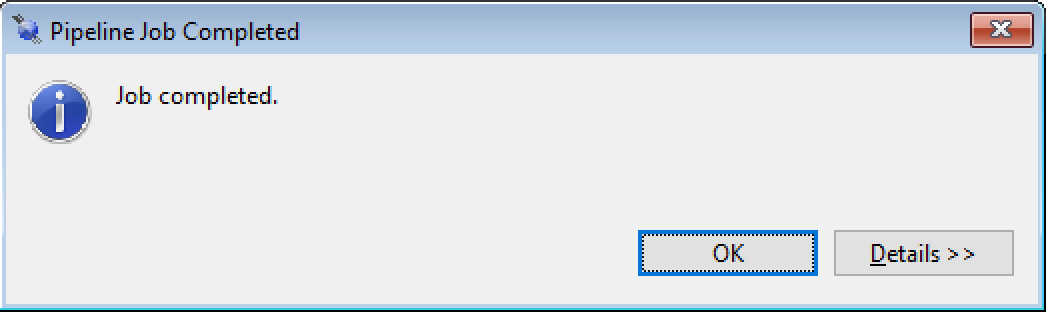
- When the project is complete, you will get a message that says “Job Completed.”
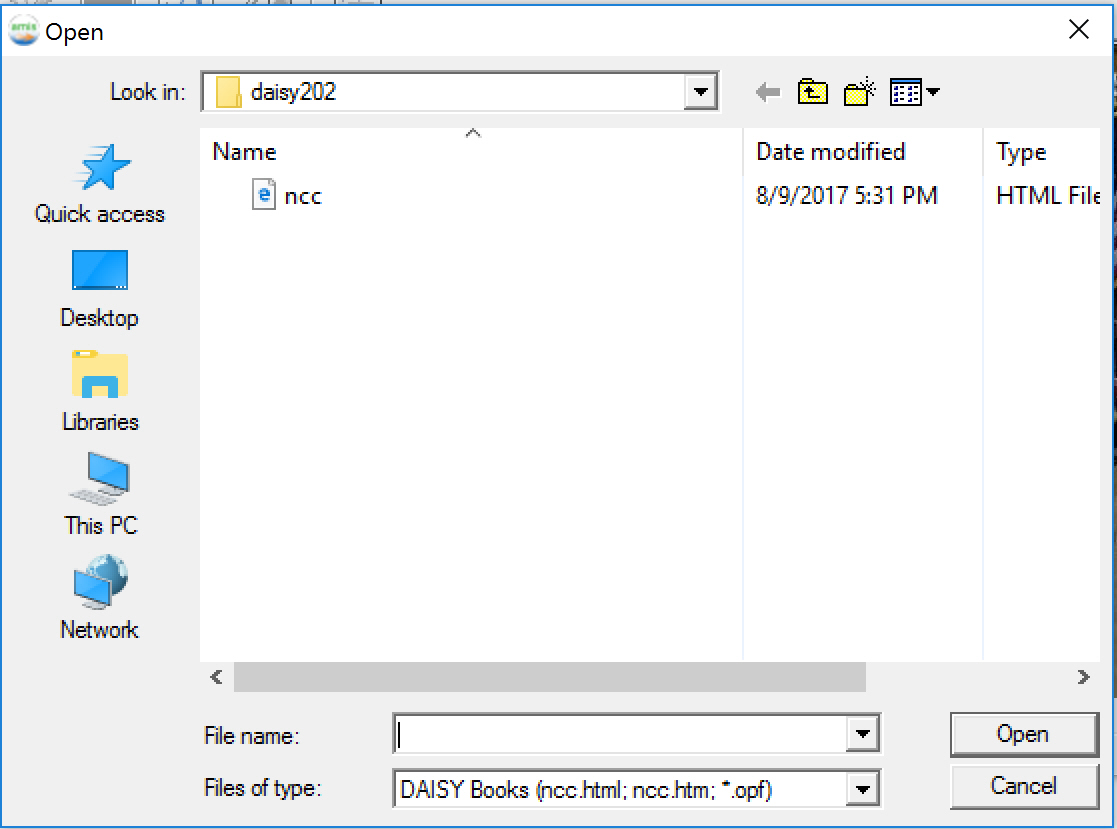
- Open AMIS (previously installed).
- From within AMIS click “File” then “Open” and then navigate to the subdirectory you saved your DAISY book to. You’ll notice that, within the directory is a sub-directory called “daisy2.02.” Open that subdirectory and you will see a ncc.html file. Select that file and click Open.
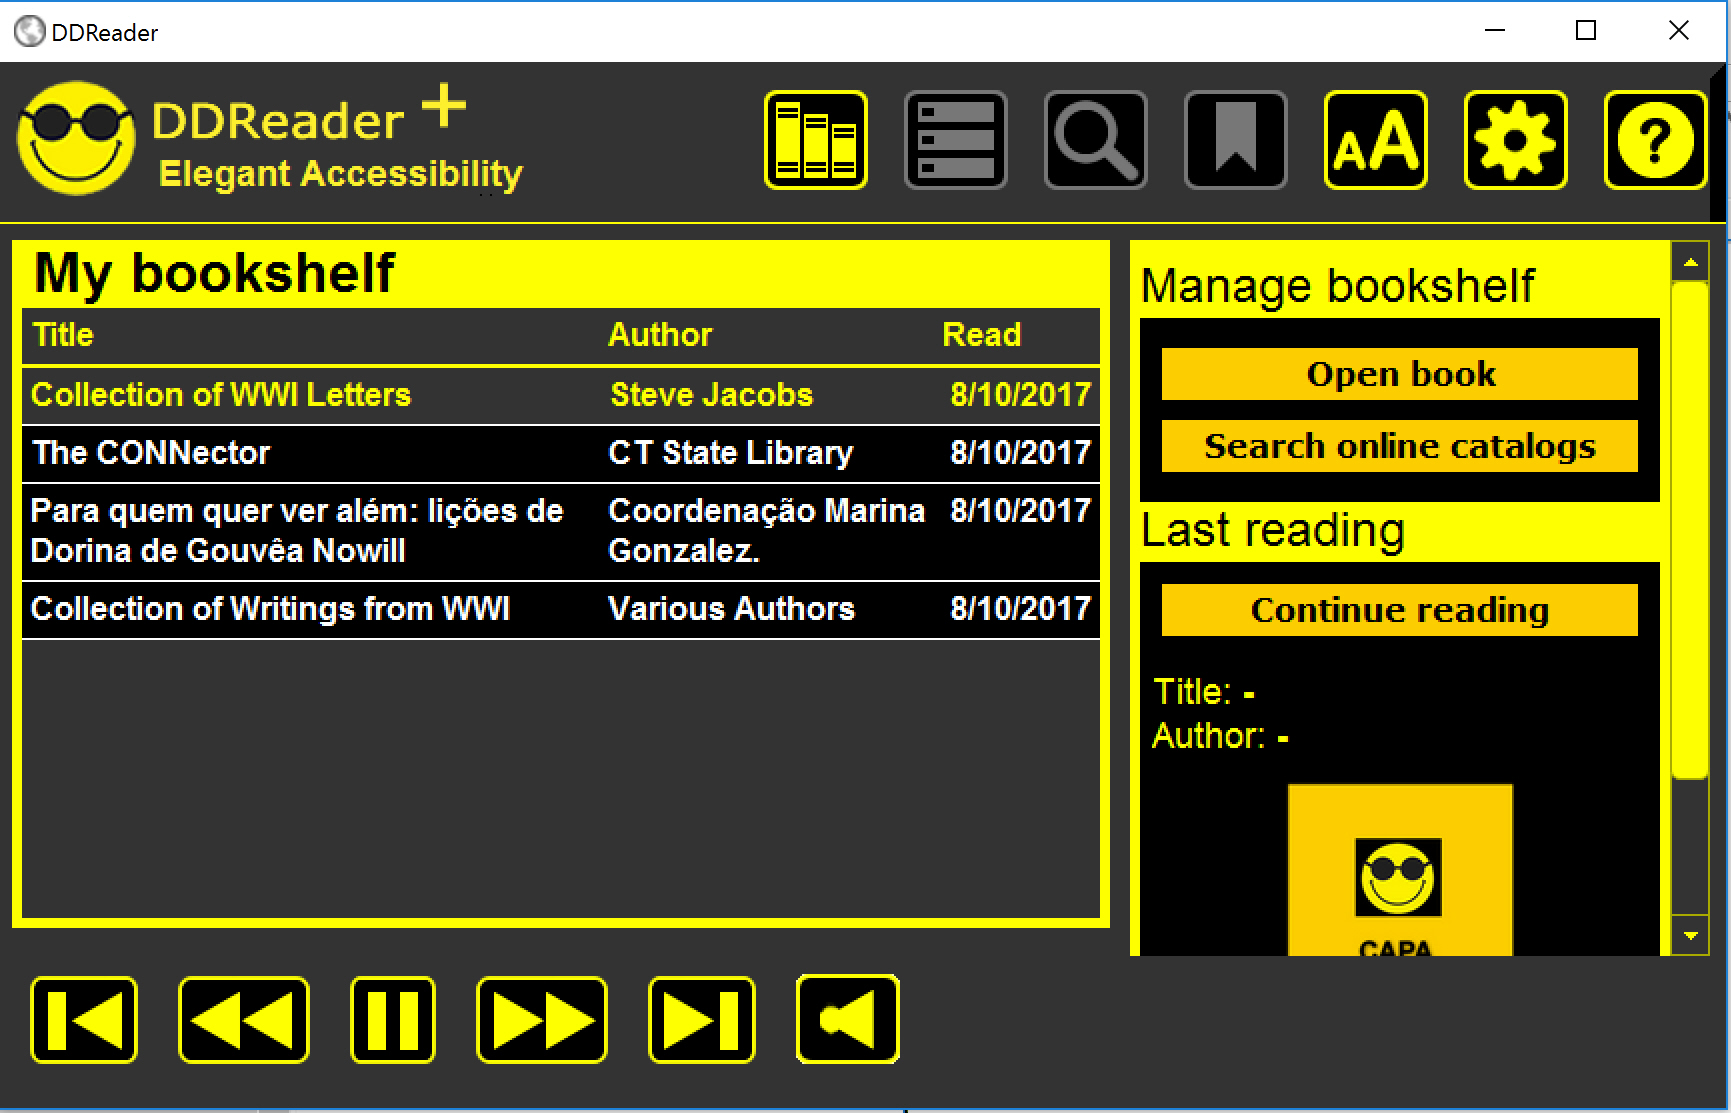
- Once the file opens you will be presented with an interface that looks like this:

- On your own:
- Click on AMIS “Help” in the menu bar. Read the “Contents” section;
- Click on AMIS “Help” in the menu bar. Read the “Keyboard Shortcuts” topics.
- Open DDReader+ (previously installed)
- Press “T” to access the tutorial. View the tutorial.
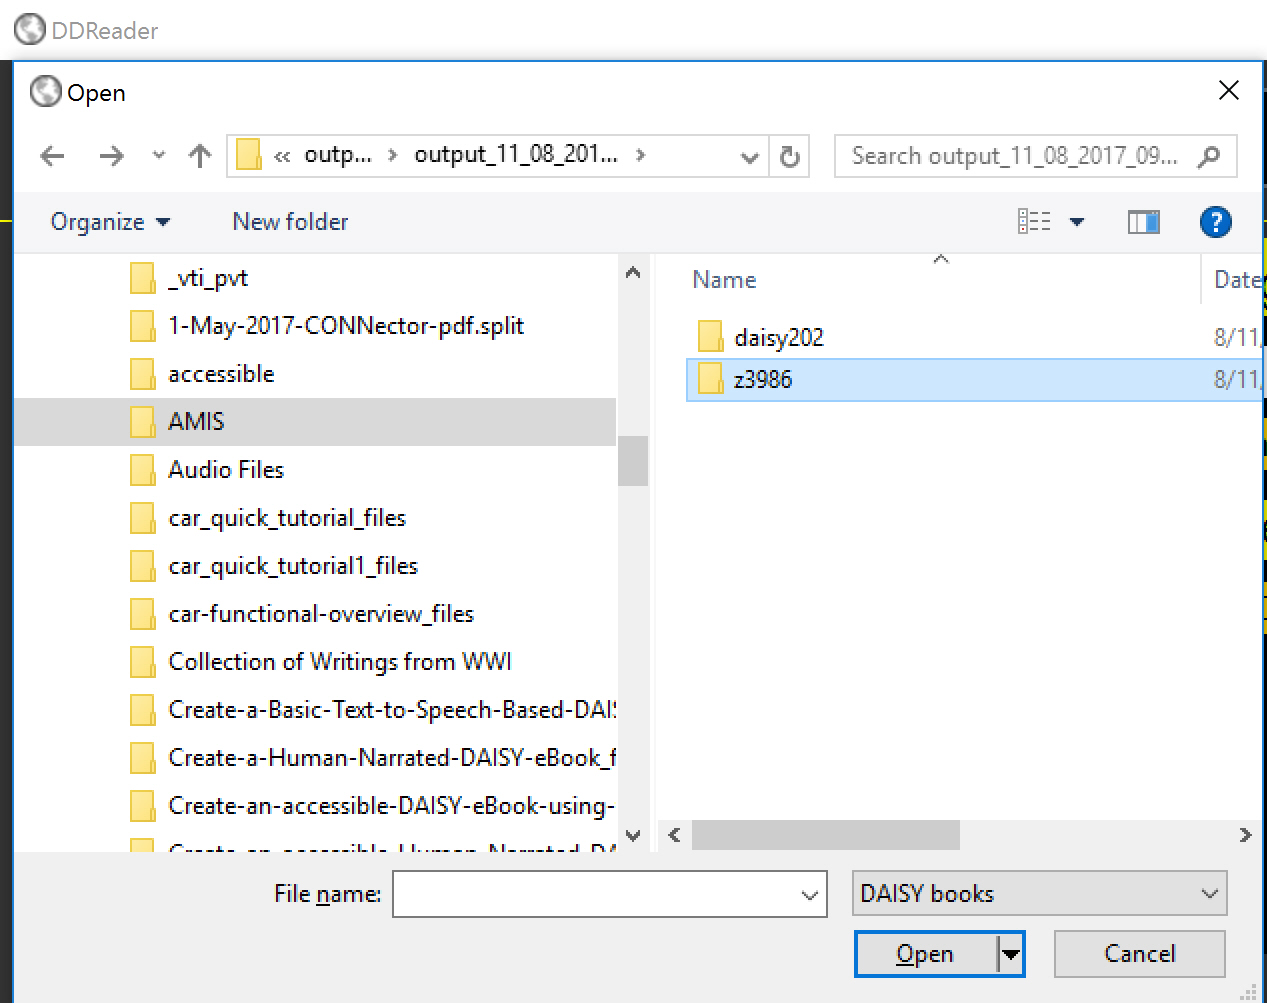
- Click the “Open book” button.
- Navigate to the subdirectory into which you saved your DAISY eBook.
- You’ll notice that there are two sub-directories. Do not select the daisy2.02 directory. Select the other directory which will probably be named similarly to the example below.
- Click on the Speechgen file.

- Click “Open.”
- The following dialog box will open:
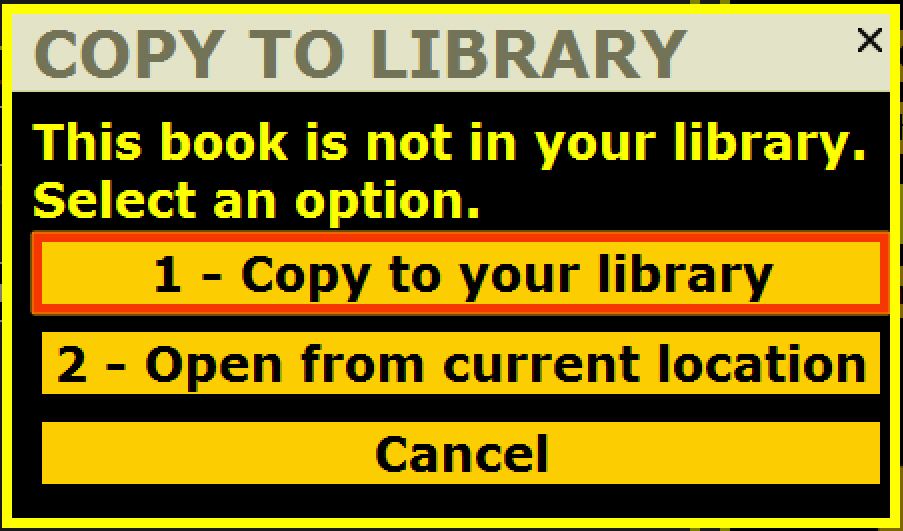
- Click on “1- Copy to your library.
- The eBook will be loaded into DD reader.
On your own:
- Learn more about using this reader by pressing the letter “T” to start the tutorial. You can also click on the ? to access more help topics.
- View the following videos:
- Review the DAISY Add-In Help File
- Click on AMIS “Help” in the menu bar. Read the “Contents” section;
- Click on AMIS “Help” in the menu bar. Read the “Keyboard Shortcuts” topics.
- Review the DDReader+ Quick Start Guide
The tutorials:
- Tutorial #1: Create an Accessible Word and PDF Document
- Tutorial #2: Use Central Access Reader (CAR) to Read an Accessible Word Document
- Tutorial #3: Generate an MP3 File From an Accessible Word Document Using Central Access Reader
- Tutorial #4: Convert an Accessible Word Document into a DAISY eBook
- Tutorial #5: Create an EPUB eBook From an Accessible OpenOffice Document
- Tutorial #6: Create an Accessible, Human Narrated, DAISY Ebook Using Tobi
- Tutorial #7: Explore IDEAL Group’s “Tesseract,” Online OCR Implementation