Tag Archives: accessibility

CRIS Partners to Educate Seniors

Enfield Senior Center

CRIS Radio has received a grant from the North Central Area Agency on Aging to train seniors in local senior centers, assistive living centers, and low vision groups on the wonders of new technologies.  Included in the trainings will be information about the CRIS app, how to use Alexa and other smart devices and Audio Reading Books. 

In addition, CRIS is developing a Technology Resource Guide, podcasts and a web page to further help seniors “plug-in”.

The first event was at the Enfield Senior Center and met with great success.  CRIS will partner with NEAT @ Oak Hill to help seniors explore the wonders of a smart home.

More information may be found HERE.

Tutorial #4: Convert an Accessible Word Document into a DAISY eBook- 2

Introduction

The DAISY Add-In was designed to help content creators produce accessible documents, from Microsoft Word documents, for people with print disabilities. Installing this add-in permits the saving of Word documents into DAISY XML, and then DAISY Digital Talking Books (DTBs), automatically. The DAISY Add-In, for Microsoft Word 2003, 2007 and Word 2010 was released in December … Continue Reading ››

Tutorial #7: Explore IDEAL Group’s “Tesseract,” Online OCR Implementation

First, SIGN UP:

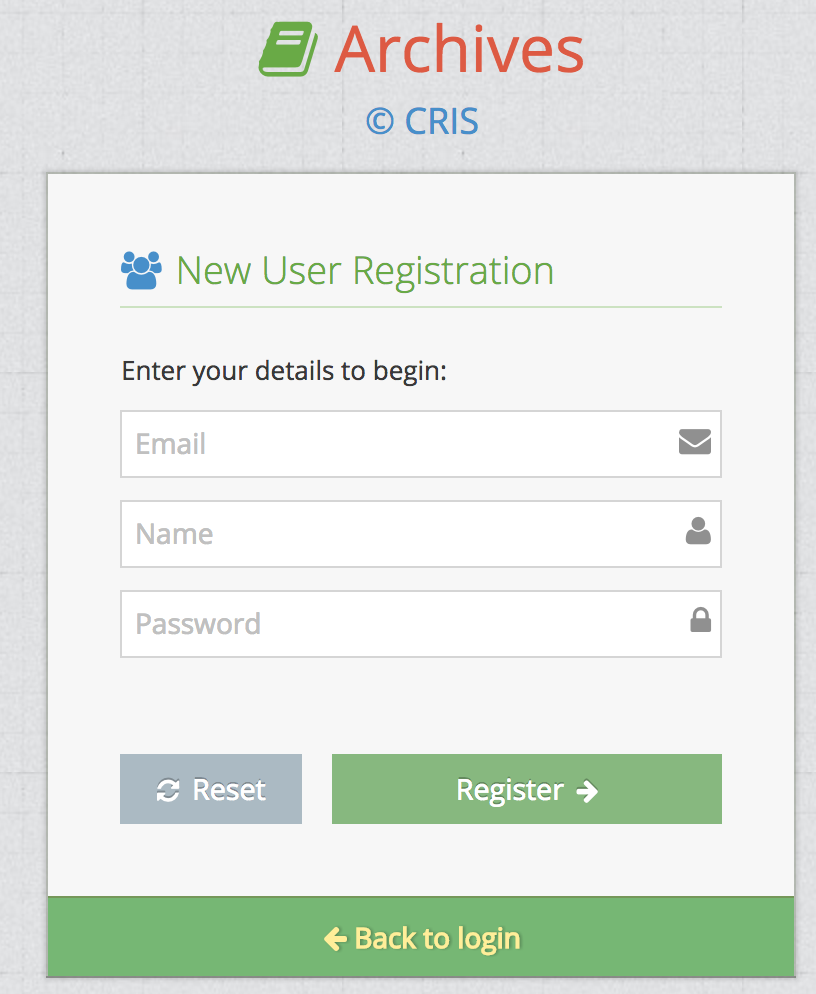
To Sign up for CRIS OCR, please go to SIGN UP or LOGIN and click on "I want to register".  A "New User Registration" dialog box will appear. See Figure 1.

Type in an eMail, Name, and Password. Click the Register button. Here are some credentials you can use to test the technology:

SECOND,  DOWNLOAD DOCUMENTS FOR TESTS

Test documents to download, submit to the OCR engine, and otherwise experiment with:

DOCUMENTATION AND INSTRUCTIONS:

Signup Page View
Signup Page View


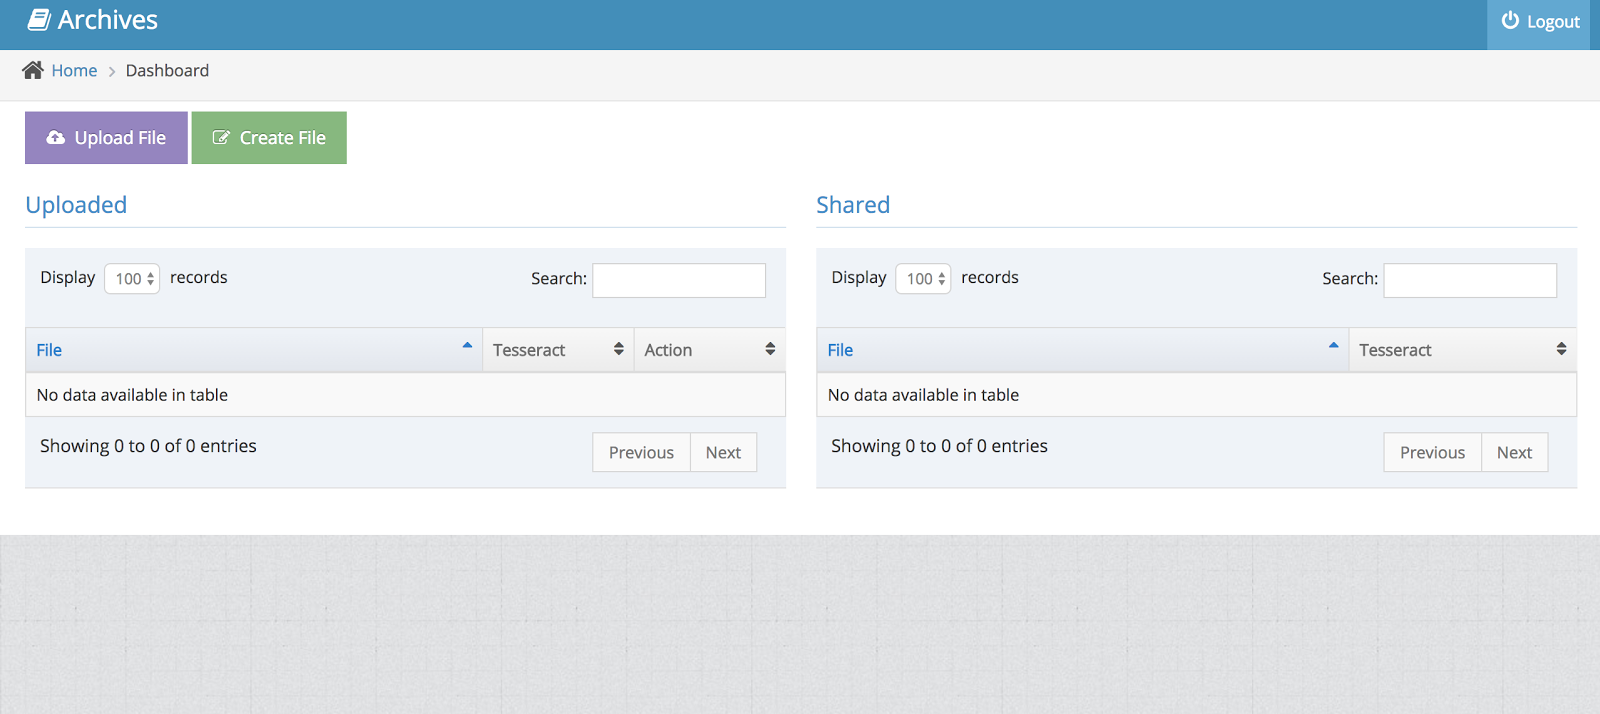
Upon successful sign up you will be directly logged into the system. You will see the user dashboard as in Figure 2. Details of dashboard are described in Section 2 below.

Figure 2. Successful Sign Up


Using the Archives System

When you login successfully or register successfully in the CRIS Archives Application you will see the "Logout" button on Top Right corner so that you can logout of the application when you have completed your work.

On the top left, there are two buttons for adding files to the  CRIS Archives Application.

  1. "Upload File" : Using this you can upload any PDF file into the archives application. The application then performs OCR on the PDF file uploaded to extract text from the PDF file uploaded.
  2. "Create File": Creates a fresh file rather than performing OCR on already existing file, then you can click on this button.

The two tables below are initially empty.  

Uploaded:

Here you will see  the PDF files that have uploaded or created using the buttons for "Upload File" or "Create File"

By default  100 records are shown, but you can customize the number of records you would like to see.

You can also type in Search box to find matching file names.

When you have uploaded the file to the system, you will see the following entries for a file in a single row.

  • File Name
  • Tesseract : (OCR engine) It has two buttons:
    • Edit Button: For Editing the OCR output generated from the PDF file or Edit the text file created.
    • Ebook Button: For downloading the ebook for the corresponding OCRed document.
  •  Action: Actions that you can perform on each file
    • Share: If you would like to invite any other user to edit the OCR output. After clicking the button,  enter the email id of the user who you would like to share the document.  They must have an account in the system.
    • Delete: If you would like to delete the entry for the file from the system.

Shared:

  • The system allows you to invite other collaborators to edit the same file that is on your system. Here you will see a list of files if anyone has invited you to edit a file "Uploaded" or "Created By" other users.


Steps for Uploading a file for OCR

Click on Upload File button.  You will taken to a page where you can drag and drop the file you would like to upload or you can click on the area to upload a file.

  • Once you select the file, please wait for the file uploader to complete 100% and show you the message "File uploaded successfully and queued for processing".
  • You can upload more files if you like using the same process, or you can click on "Check Files" to go back to list of files.

In the list of files in Uploaded section, you can search the name of the file you just uploaded.

  • Click on the "Edit" button. If the file process is not complete, it will show you the message "The file submitted by you is still being processed."
  • If the OCR process has completed successfully, you will be taken to the editor,  where you can see the original file uploaded and OCR output next to each other.


Steps for Creating an EPUB:

Once the OCR process has successfully completed, you are taken to the page where you can see the original file and the OCR output in an editor side by side.

The editor on the web-browser has all the standard editing functions of MS-Word. You can format the output of the OCR and correct to match the original document.

Please make sure to mark the headings in the document accordingly as they are used by the EPUB generator to create table of contents.

Once you have finished the formatting and correcting of the OCR output, you can click on EPUB button on the editor to export the document in EPUB Format.

The exported EPUB format is readable on any fully compatible EPUB reader.


Tutorial #1: Create an Accessible Word and PDF Document

If Adobe Acrobat Reader DC is not already installed on the computer you are using to take this tutorial, please install it from the following website: https://get.adobe.com/reader/

Background Information:

Microsoft Word is currently the most common word processor on the market. As such, the .docx format has become a popular format for … Continue Reading ››

Tutorial #2: Use Central Access Reader (CAR) to Read an Accessible Word Document

CAR Quick Tutorial
  1. Download and install Central Access Reader (CAR), a powerful open source accessible reader (Windows 64-bit only): http://archive.org/download/CARSetup64/CAR_Setup_64.exe
  2. We recommend making this reader available from your website if you decide to provide digital materials in accessible DOCX format.
  3. Open Central Access Reader.
  4. Go to the "Advanced Settings Menu",Continue Reading ››

Tutorial #3: Generate an MP3 File From an Accessible Word Document Using Central Access Reader

In this tutorial you will convert and save all, or portions, of the DOCX file you created as an MP3 file.
  1. Open Central Access Reader.
  2. Press Ctrl-M to save the complete DOCX file as an MP3 file.
  3. Play the MP3 file with any MP3 player.
Next,
  1. Edit-Copy the title of any article in the newsletter.
  2. Highlight … Continue Reading ››